
You can connect Magento 2 with QuickBooks using tools like Zapier and Automate and extensions like QuickBooks Online Integration.
The benefit of using Zapier is that it automatically syncs Magento 2 to QuickBooks every 1 to 15 minutes based on your plan. You don’t have to set up auto-sync separately to manage your accounting data.
This article will show you how to integrate QuickBooks with Magento using Zapier to automate recurring tasks.
Note: You’ll need accounts with Zapier and Quickbooks to sync Magento 2 to Quickbooks.
Sync Magento 2 to Quickbooks using Zapier
Generate a Zap
- Log in to your Zapier account and click the orange Create Zap button.

Click Create a Zap - Name the Zap on the top left by clicking on the Edit icon.

Click the Edit Icon

Create a Trigger Event
- Set up the following fields in the “Choose app & event” section:
App event: Add Magento 2.x (Premium) from the search box to kick off the automation process.
Event: Select a “trigger” event to start a zap. The event can be a new product, customer, order, sales order credit memo, sales order credit invoice, or sales order shipment.
Click Continue to proceed.
Configure the Choose app & event section - Click Sign in to allow Zapier to connect to your Magento 2.x account in the “Choose Account” section. Enter the entire domain, admin username, password, and store code of your Magento store. Click Continue to go to the next section.

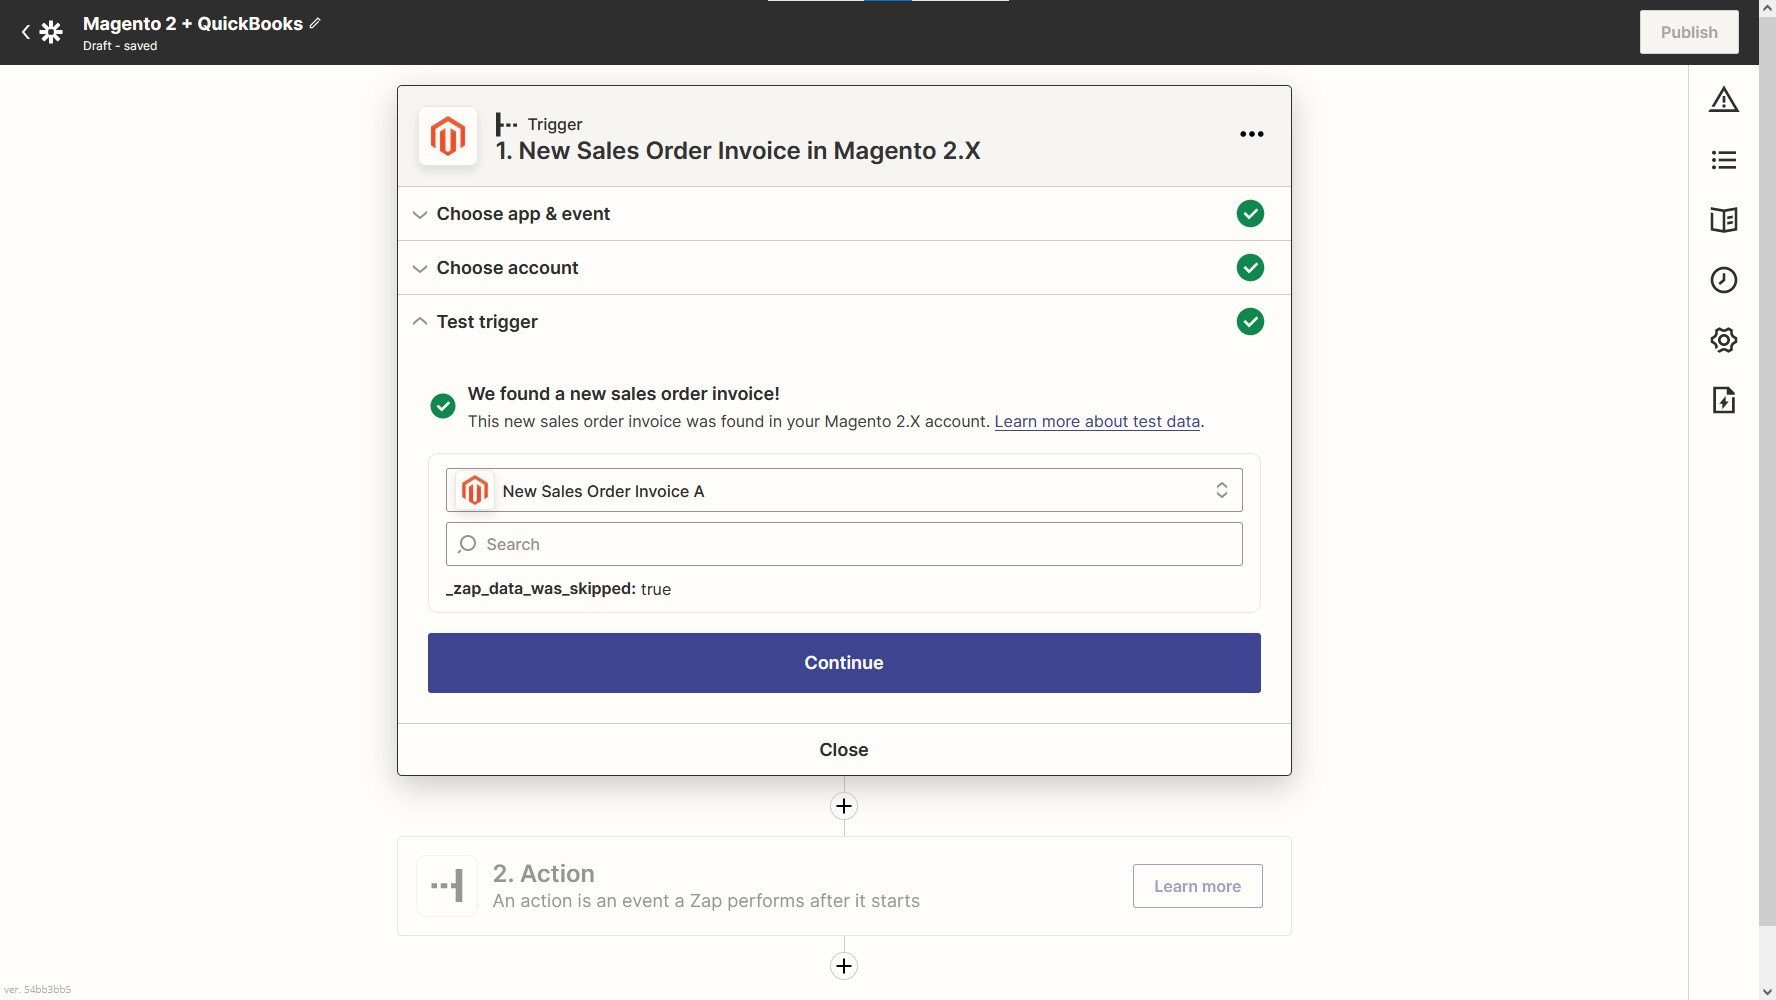
Configure the Choose account section - Next, in the “Test Trigger” section, click Test Trigger to verify if your Magento store is connected to Zapier correctly. Click Continue upon success.

Test Trigger and click Continue


Create an Action Event
- Set up the following in the “Choose app & event” section:
App event: Add QuickBooks Online from the search box.
Event: Select one of the twenty-seven action events. An “action” is an event that a Zap performs when the trigger event occurs.
Click Continue to proceed.
Choose app & event and click Continue - Click Sign in to allow Zapier to connect to your QuickBooks account in the “Choose Account” section. Once you’ve signed into the account, click Allow to let Zapier access your account. Click Continue to proceed.

Sign in to QuickBooks account - Select appropriate options in the fields in the “Set up action” section. The fields displayed depend on the trigger event. Click Continue.

Configure the Set up action section - Click on Test action to check if the integration between the two applications is working correctly. You may choose to skip the test by clicking on Skip test.

Click Test & continue or Skip test - Click Publish Zap to create a zap.

Click Publish Zap


You’ve now successfully connected Magento 2 with QuickBooks using Zapier. You can read examples of how to automate tasks with QuickBooks here.