Outlook rules allow you to apply specific actions automatically (e.g., move, flag, delete, etc.) to emails, provided that they meet the conditions you’ve set. After setting up any rule, it will apply to all your current and future messages. Follow the guide below to set a new rule in the Outlook desktop and web app.
How to create a new Outlook rule
On Outlook desktop app
- Launch Outlook Desktop Then, navigate to the File tab.

Select File. - In the “Info” tab, select Manage Rules & Alerts.

Click Manage Rules & Alerts. - Select New Rule.

Click on New Rule. - Under “Step 1,” choose your template or start from a blank rule.

Pick a template or a blank rule. - Under “Step 2,” click on the underlined blue words to edit where the rule applies and what it will do. This will differ depending on what rule you chose. After editing the values, click Next.

Change the value of the underlined words. Then, click on Next. - Mark the conditions you want to apply to your rule. Then, hit Next.
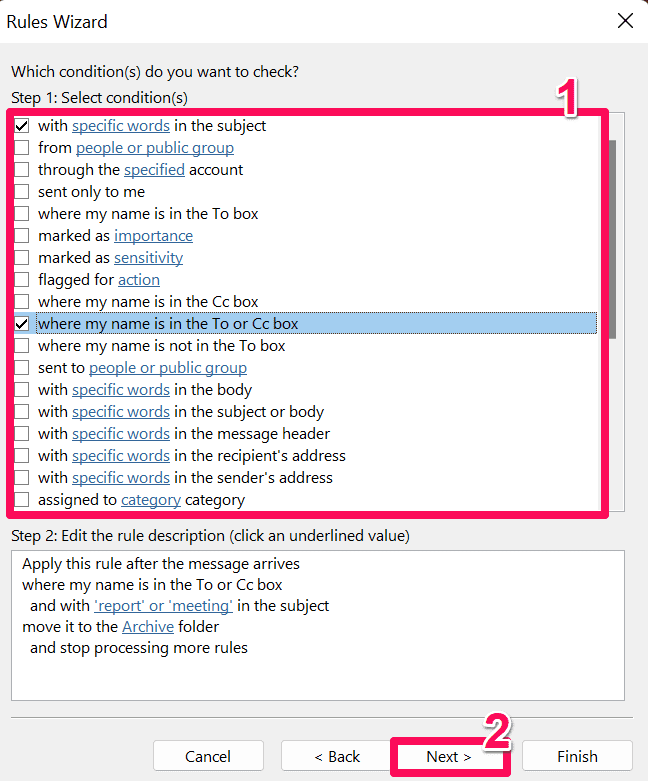
Tick the conditions you want to add. Then, click Next. - Choose the actions you want your rule to do. Then, hit Next.

Tick the actions you want to add. Then, click on Next. - (Optional) Mark which exception you want to include in the rule. Then, hit Next.

Tick the exceptions you want to add (if there are any). Then, click on Next. - Enter a name for the rule under “Step 1.”

Type a name for your rule. - Check the rule options you want to apply under “Step 2.”:
- Run this rule now on messages already in “Inbox”: This will automatically apply your rule to existing messages in your Inbox folder
- Turn on this rule: This will apply the rule to any future emails you’ll receive.
Then, hit Finish. In the pop-up window, select OK.
Tick the rule options you want to apply. Then, click on Finish. 
Click on OK.
On Outlook web
- Sign in to outlook.com. Then, select the Settings icon on the top-right of the page.

Click on the gear icon. - Choose View all Outlook settings.

Click on View all Outlook settings. - Under the “Mail” tab, go to Rules.

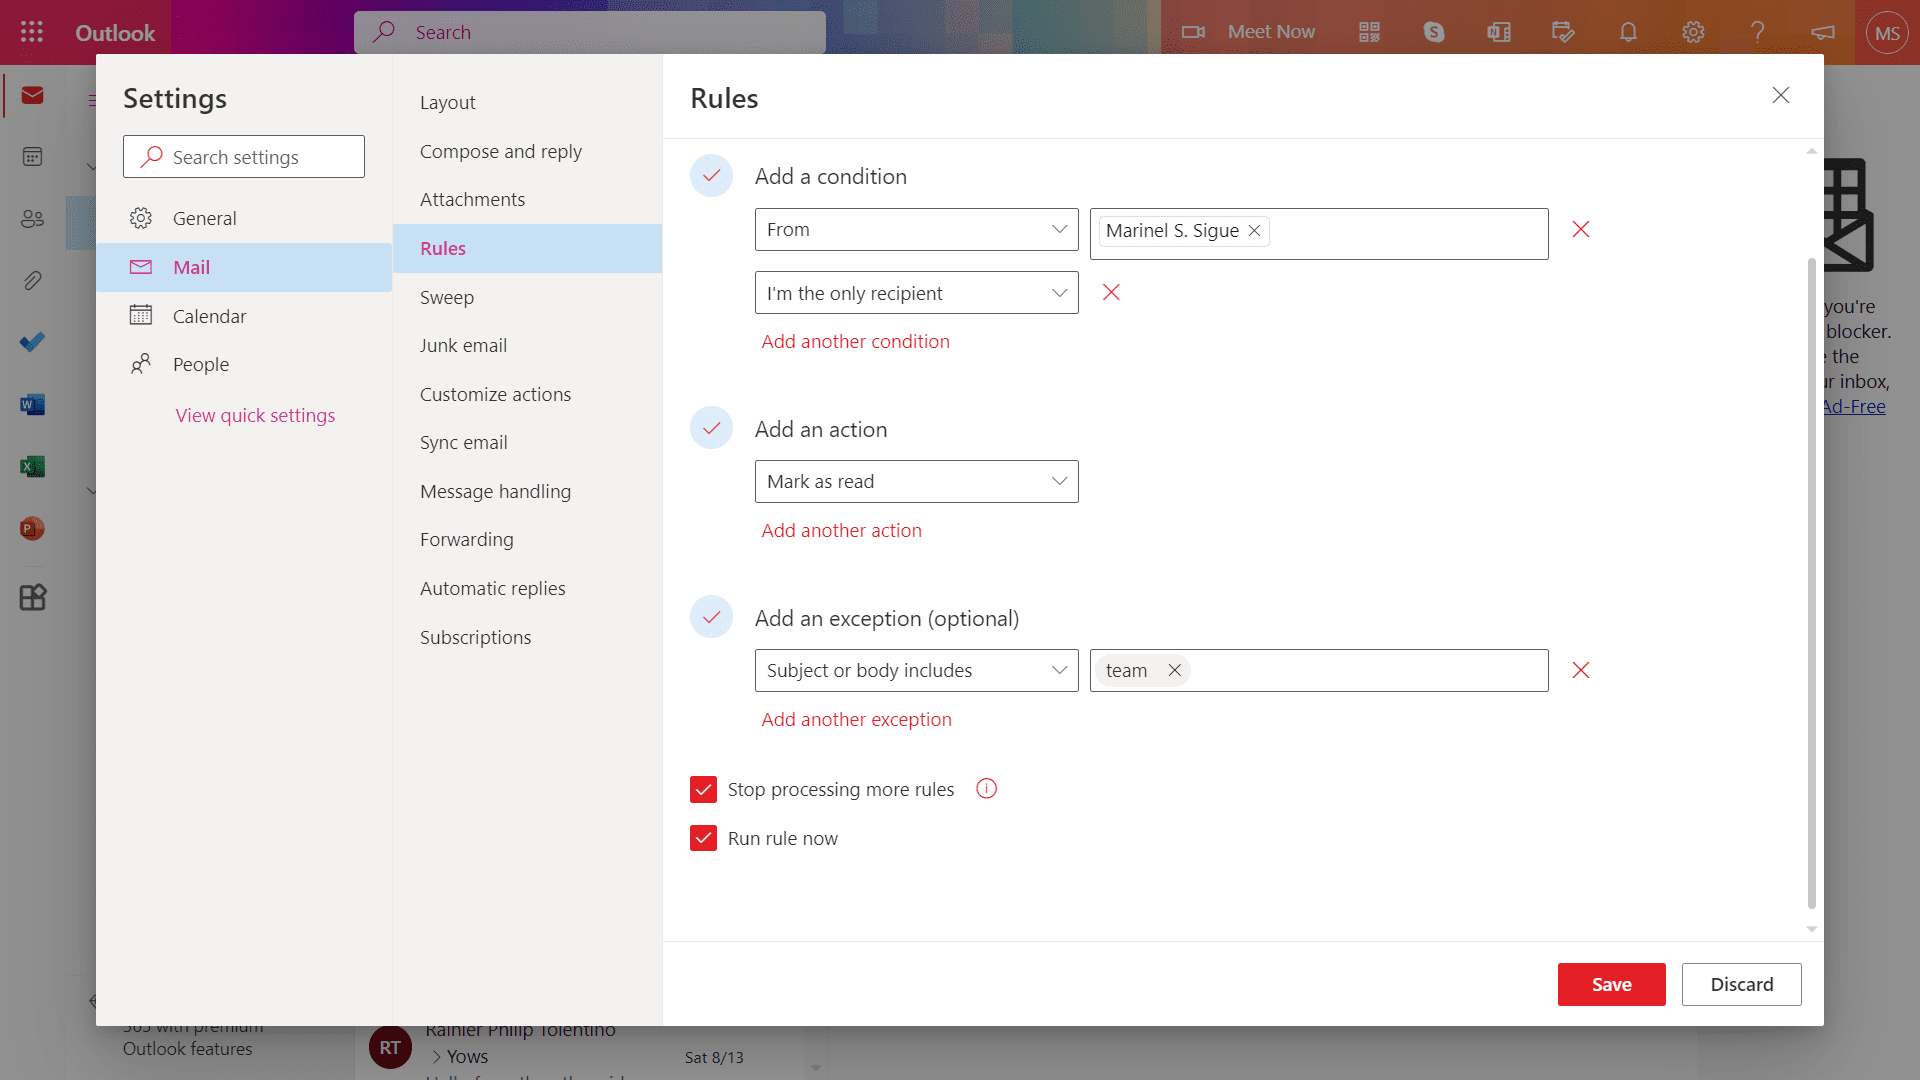
Click on Rules. - Select Add new rule.

Click on Add a new rule. - Enter a name for your rule.

Type a name for your rule. - Choose Select a condition and select which to add to your rule. You can add as many conditions as you need.

Click on Select a condition. Then, click on the conditions of your choice. - Click Select an action to choose what you want your rule to do. You can also add as many actions as you like.

Click on Select an action. Then, choose an action from the list. - (Optional) Select Add an exception to include an exception in your rule.

Click on Add an exception. - Check the box for the Run rule now. Then, hit Save.

Tick the Run rule now checkbox. Then, click on Save.
Create a new rule based on your messages
Outlook lets you create a rule directly from a message or email you’ve previously sent. This method is easier for specific situations, such as when you want to filter messages from a particular person. You can simply look for their email in your Inbox and create a rule. Follow these steps:
On Outlook desktop
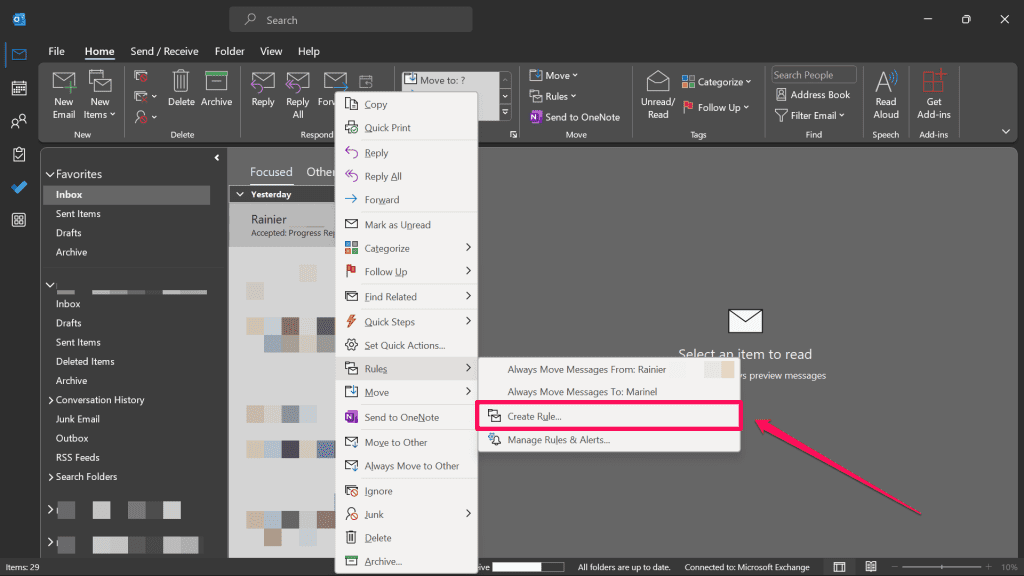
- Launch the desktop app. Right-click on the email you want to base the rule on.

Right-click on the email of your choice. - Select Rules from the menu.

Click on Rules. - Choose Create Rule.
Click on Create Rule. - Under “When I get email with all of the selected conditions,” mark the conditions you want to apply to your rule.

Check the conditions you want to apply. - Under “Do the following,” mark the actions you want the rule to do. Here, you have three actions to choose from:
- Display in the New Item Alert window: This displays the emails in a pop-up window on your computer to alert you of the new message.
- Play a selected sound: This plays a custom sound for emails that fit the rule.
- Move the item to folder: This moves the email to a folder you’ve specified.
Choose one action, then hit OK.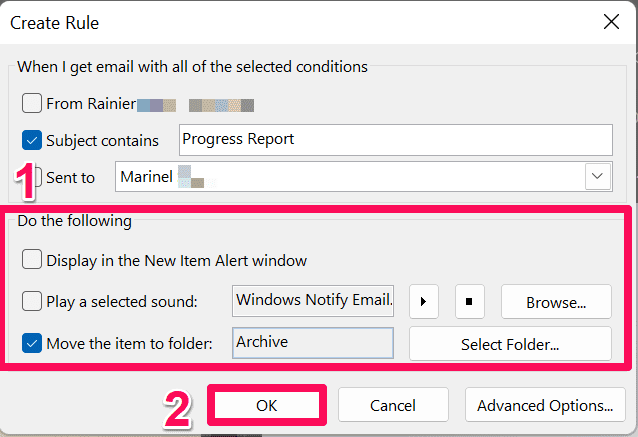
Check the actions you want to apply. Then, click OK.
- In the pop-up window, check Run this rule now on messages already in the current folder for your rule to apply immediately to your existing emails. Incoming emails will also follow this rule moving forward. Then, hit OK.
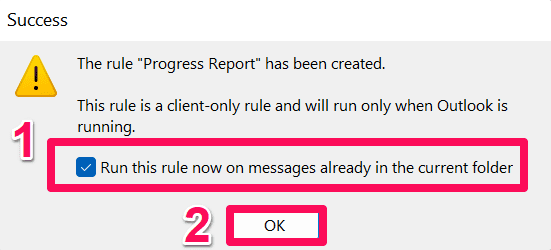
Mark the checkbox. Then, click OK.
On Outlook web
- Sign in to outlook.com. Then, right-click on the email you want to base your rule on.

Right-click on the email. - Select Advanced actions from the menu.

Click on Advanced actions. - Choose Create rule.

Click on Create rule. - If you want to use the default rule that moves messages to a specific folder, select or create a folder from the drop-down menu. Then, hit OK.

Click on a folder in the menu. Then, click on OK. Mark the checkbox for Run this rule now in Inbox. Then, select OK.

Mark the checkbox for Run this rule now in Inbox. Then, click on OK. - If you want to make a custom rule, select More options.

Click on More options. In “1”, change the rule’s name or keep it as is.

Type a name for your rule, or leave it as is. In “2,” select Add another condition and pick from the drop-down menu what condition to include in your rule.

Click on Add another condition. 
Pick a condition to include. In “3,” choose an action from the drop-down menu.
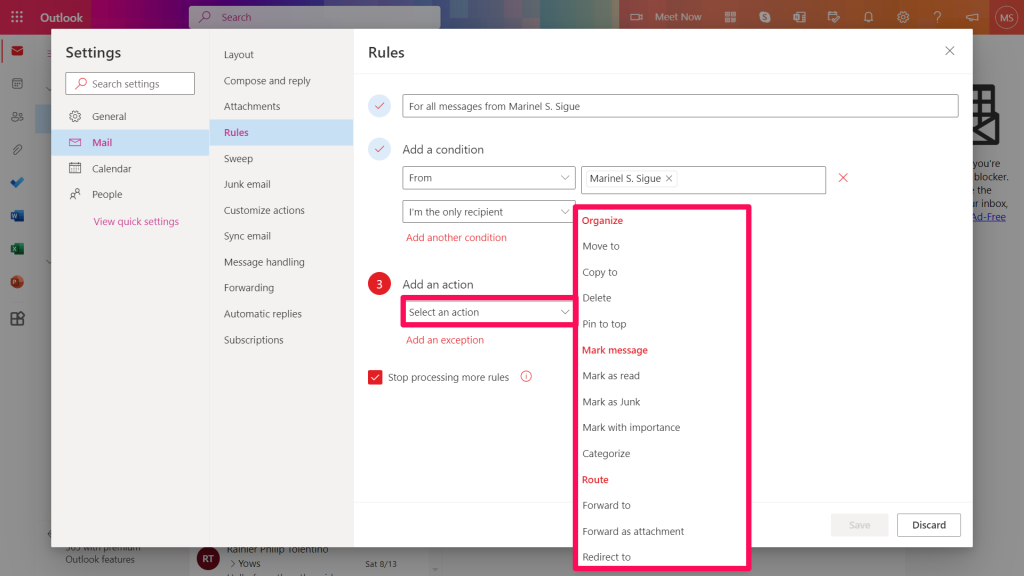
Click on an action from the list. (Optional) Select Add an exception if you need one. Then, choose from the drop-down menu which exception to include.

Click Add an exception. 
Pick an exception to the rule. Mark the checkbox for Run rule now to apply the rule to your emails immediately. This will apply to both existing and incoming messages. Then, hit Save.

Tick the checkbox for Run rule now. Then, click on Save.